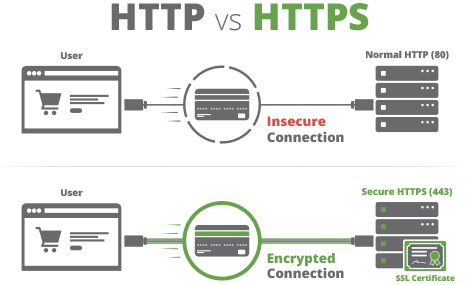
SSL certificate is very important for a website. SSL stands for Secure Socket Layer it will establish a secure connection between the web server and the visitor. After installing the SSL certificate, the first thing you need to redirect HTTP to HTTPS. If your website doesn’t have an SSL certificate, You can get a free SSL certificate for a lifetime. Because if your website visitors go through an HTTP connection after installing SSL, Google Chrome and Mozilla Firefox will show them an insecure warning on your website. What you need to do is redirect HTTP to HTTPS.

In this post, I will show you step by step tutorial to redirect HTTPS to HTTPS. Let’s Begin
Redirect HTTP to HTTPS using .htaccess
To redirect your website visitor HTTP to HTTPS in Apache Server (Cpanel or Shared Hosting), You need to add some code in your website .htaccess file. Login to your website Cpanel or Control panel and open file manager. Go to your website root directory and find the .htaccess file. Then click on edit and add the following code below in the .htaccess file.
RewriteEngine On
RewriteCond %{HTTPS} off
RewriteRule (.*) https://%{HTTP_HOST}%{REQUEST_URI}
If this code is not working in the Apache server, You have to enable the mod_rewrite module. To enable mod_rewrite in your apache server, edit httpd.conf file and add the following line.
LoadModule rewrite_module modules/mod_rewrite.so
Then restart your apache server and test your website url with HTTPS. I hope it works.
Redirect HTTP to HTTPS in WordPress
To redirect HTTP to HTTPS in WordPress, You just need to install a plugin called Really Simple SSL. Login to your website WordPress dashboard and go to Plugins > Add New. Then search Really Simple SSL and click on Install Now and Activate it.

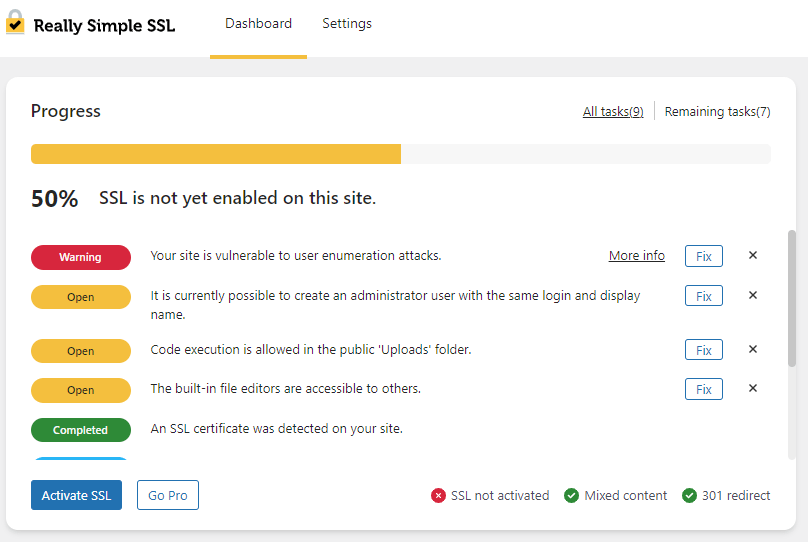
After installing Really Simple SSL, Go to Settings > SSL. Now you need to click on Active SSL from the Really Simple SSL dashboard. That’s it now it will redirect all your website visitors to HTTP to HTTPS. For more SSL security, Complete the further steps from the Really Simple SSL Dashboard.

Redirect HTTP to HTTPS in Nginx
To redirect HTTP to HTTPS in Nginx, You have to update your server Nginx config file. You can find your default config file in /etc/nginx/sites-available directory. If don’t any config file in this directory, search it on /etc/nginx/nginx.conf, /usr/local/nginx/conf, or /usr/local/etc/nginx.
After finding the Nginx config file, Open this file on the default editor by entering this command:
sudo vi /your-file-location
An Example:
sudo vi /etc/nginx/sites-available/defaultThen update the following line below in your Nginx server config file.
server {
    listen 80 default_server;
    server_name _;
    return 301 https://$host$request_uri;
}
Config file text breakdown:
- listen 80 – This tells the system to redirect all the traffic to port 80.
- server_name – this will match with any hostname.
- return 301 – 301 means tells the system to permanently redirect to this URL.
- https://$host$request_uri – This will redirect your visitor HTTP to the HTTPS URL.
Once you complete updating the config file, save this file and exit. Now you have to restart your Nginx server to make it works. To restart the Nginx server, Enter the following command below:
sudo service nginx restartThat’s it. Now In your Nginx server, all incoming traffic will redirect HTTP to HTTPS.
Conclusion
I hope you have successfully redirected your website from HTTP to HTTPS. It’s a very easy process. If you find any problem redirecting HTTP to HTTPS, Please comment below.


